Running mailbagit in a Docker container
A docker image is available that includes all dependencies. You just need to install Docker. Docker Desktop comes with everything you need, but you really only need Docker Engine.
Once Docker is installed, you can download the mailbagit image with the command:
docker pull ualbanyarchives/mailbagit
Run with docker-compose.
The simpiest way to run mailbagit in a docker container is with docker compose. For this you have to download the provided docker-compose.yml file at https://raw.githubusercontent.com/UAlbanyArchives/mailbagit/main/docker-compose.yml.
Place the docker-compose.yml file in your working directory along with the data you are working with.
.
└── my_folder/
    ├── docker-compose.yml
    ├── email_archive.mbox
    └── export.pst
From this directory (my_folder) run:
docker compose run mailbagit
This will mount your current working directory inside the container at /data. You can then run mailbagit on the files in this /data directory.
/data
  ├── docker-compose.yml
  ├── email_archive.mbox
  └── export.pst
Run without docker-compose
To run the image directly as a Docker container, run:
docker run -it ualbanyarchives/mailbagit:latest bash
You should be able to run mailbagit -h, but you won’t be able to do much without giving the container access to your filesystem with docker-compose or a bind mount.
Run with bind mount.
You can also use a bind mount to give the container and mailbagit access to another directory. docker-compose does this automatically.
Mailbagit will have access to the directory listed in the source= argument, which will be accessible in the container using the /data path.
Examples:
docker run -it --mount type=bind,source="path/to/data",target=/data ualbanyarchives/mailbagit:latest bash
docker run -it --mount type=bind,source="C:\Users\Me\path\to\data",target=/data ualbanyarchives/mailbagit:latest bash
If you are using Windows, the source= argument should be given a Windows path with “\”, but the container uses Unix-style paths, so it will be accessible to mailbagit using /data using “/”.
So, if you have a PST file in C:\Users\Me\sampleData\export.pst, if you use
type=bind,source="C:\Users\Me\sampleData",target=/data
the PST will be accessible at /data/export.pst.
You could also use
type=bind,source="C:\Users\Me",target=/data
which will make the file accessible as /data/sampleData/export.pst
Using Docker Desktop
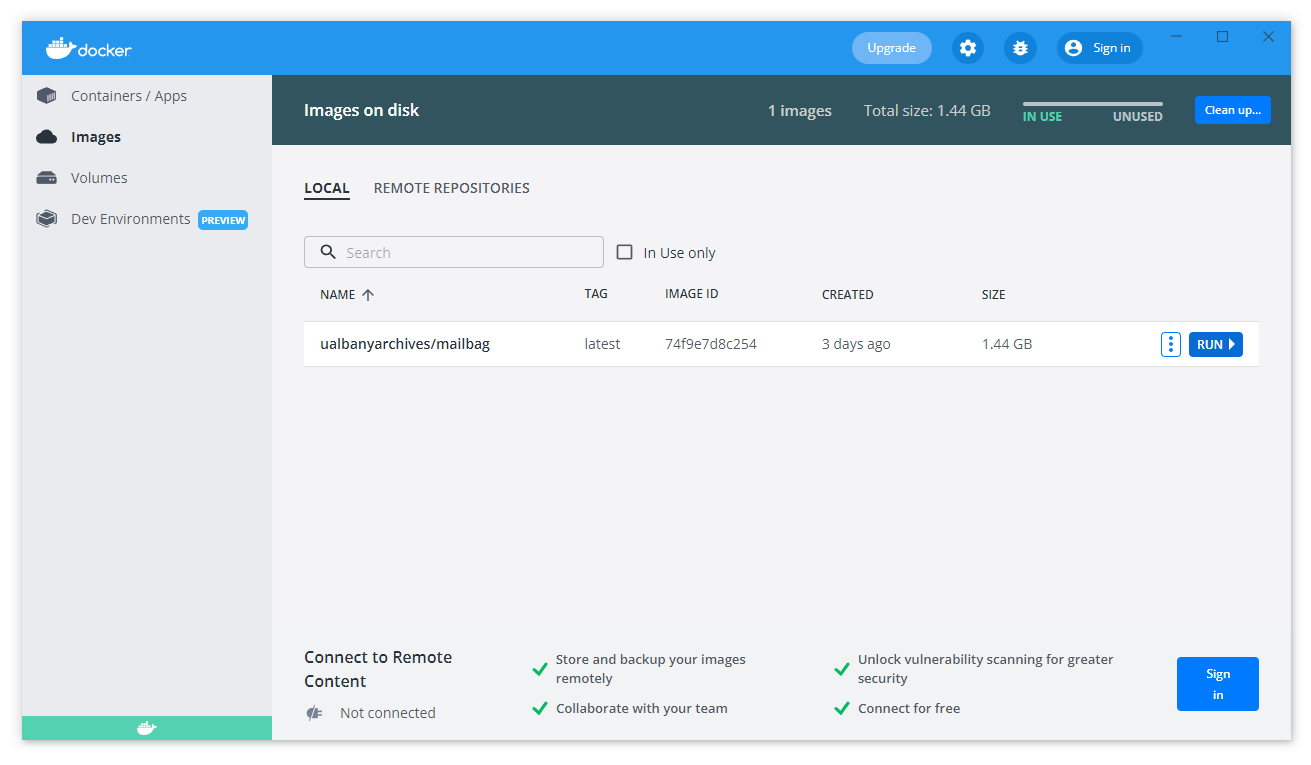
Once you’ve downloaded the docker image with docker pull ualbanyarchives/mailbagit, you can also run the image using Docker Desktop.
The ualbanyarchives/mailbagit image should display. To run it, click “Run”.
To give the container access to your filesystem, click on the optional settings and enter a “Host Path” and an “Container Path”. This follows the same rules as described above.

You can then click the “CLI” button for command line access to mailbagit.
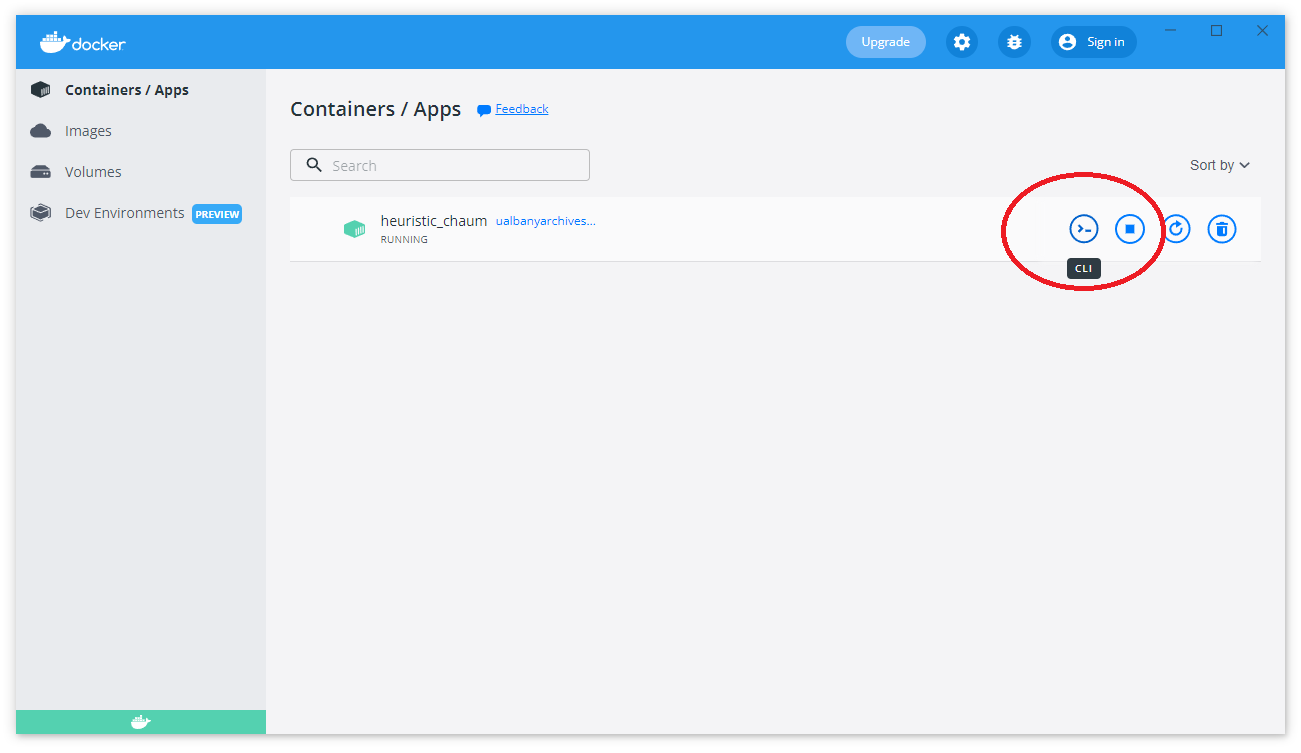
Remember to stop the container when you’re done!
Development Docker image
There is also a development image available. This contains an consistent environment for mailbagit, but allows you to work directly with local code. Mounts a directory with test email data at ./sampleData to /data.
docker pull ualbanyarchives/mailbagit:dev
git clone git@github.com:UAlbanyArchives/mailbagit.git
cd mailbagit
git switch develop
docker-compose -f docker-compose-dev.yml run mailbagit
mailbagit -v